About waneyh

Just an ordinary person...;)

RJ45 Cable

Below are the pictures of how to set up the cable of CAT E5 to RJ 45. This cable can be done in two ways. Its either in Straight through cable or Cross over cable.

The pictures given are some of the tools that have been used:-

The colors for the straight cable and cross over cables are basically the same, its just that the differences between them is that the cross over cable is twisted with one another. However, for the straight through cable, it is directly connected to the RJ 45.

What would happen to the world if there’s No technology

Nowadays, technology has risen and grown very steady .Technology use are everywhere as it keeps on advancing, one invention after the next. Ultimately , we can say that ,”living without technology is like living without air” in this technical world of today.Therefore, we are much dependent on technology. There are positive and negative aspects of technology progression. The benefits of having technology can be vary and thus communication and education sometimes play the most important role among the population recently and they are such as below:-

Benefits of having Technology to the world in terms of communication:-

  • Speed : time is no longer a constraint in communication
  • Clarity : With megapixel images and video, and high fidelity audio systems clarity in communication has become a never-before experience.
  • Proximity :  technological advancements have made the world a smaller place to live in.
  • Dissemination : whether spreading information, broadcasting news, or sharing knowledge, technology has made it faster, easier, and smarter.

Benefits of having Technology to the world in terms of education:-

  • Personalized learning experience: Learners are able to take control and manage their own learning. They set their own goals, manage the process and content of learning, and communicate with peers.
  • Immediate response: Most e-learning programs provide immediate feedback on learner assessments. Similarly there are features such as chat, discussion boards, e-libraries, etc that allow clarifications at a faster pace than in traditional classrooms.
  • Self-paced: Learners can chart courses at their own pace. This ensures higher levels of motivation both in terms of completing the course as well as in performance.
  • Greater access: Technological advancements have opened education to learners with learning disabilities and in remote locations.

Overall, technology is in need among the population in this world as it benefits them in many aspects. Furthermore, imagine a world without technology and how it will affect the population who used to adapt to various kind of technology.

In conclusion, if there is no technology to the world, it  will go dull and the students are like living in a world without a useful resources and lack of information.


Function for types of software for preventive maintenance

Preventive Maintenance has been defined earlier and when it comes to types of software for preventive maintenance, they were various types of them, for example check the file system for errors, check disks for read errors, scan disk and files for virus an defrag hard disk volume. Thus, they have their own functions and some of them are as below:-

Checking for the file system consistency.

Function: To discover all error messages that indicate the need to run fsck .

Checking disks for read error.

Function: To find out whether there are problems with a hard drive and possibly as a solution to the problem. If disk error scans reveal errors that cannot be fixed, the user can replace the hard drive to avoid problems that might be caused by running a bad hard drive.

Scan disk and files for virus

Function: It is designed to repair damaged hard drive sectors and clusters on your computer’s hard drive. Furthermore, it provides a report that contains the errors it has found and the amount of disk space it has scanned.

Defrag hard disk Volume

Function: It brings them all back together, “defragmenting” them, which makes them easier to access for your computer, and therefore makes it faster to access the files.

PC Preventive Maintenance

What is PC Preventive Maintenance?

When it comes to PC Preventive Maintenance, it is referred to carrying out measures to prevent problems from occurring, in contrast to corrective maintenance, which seeks to solve an already existing problem. In the long run, preventive maintenance saves time and money, protects your data, improves computer performance, and prolongs computer life. These are accomplished by considering and planning for the risks involved in working with computers (e.g. data loss, hardware failure).

PC Preventive Maintenance can be classified into three categories and they are:-

  1. Mechanical Maintenance is refers to general cleaning of the PC.
  2. Electrical Maintenance is refers to surges protection for your PC.
  3. Software and Hard Disk Maintenance is refers to Antivirus Software where it searches for viruses in the PC and also defragmenting your PC.

How to perform PC Preventive Maintenance?

Basically, they are several steps or checklists can be done in order to perform PC Preventive maintenance which it can be done by day, week, month and year.

Here are the important things need to perform by day:-

  • Run Malware, anti-spyware and antivirus programs at startup.
  • Empty the Recycle Bin at the Desktop.
  • Clean out browser files, or set the browsing history to zero.
  • Log off your user account.
  • Shut down the computer if necessary.
Next is the things you should do every week for your PC:-
  • Run Disk Clean Up Utility to get rid of temporary files, cookies, and other file debris.
  • Check hard drives for errors and capacity with Check Disk Utility.
  • Update malware and anti-virus software to download new virus definitions.
  • Verify all connections to computer workstations, printers, networks and other peripheral devices.
Later is the checklists for PC Preventive Maintenance which can be done every month:-
  • Rearrange fragmented files with Disk Defragmenter utility.
  • Backup files.
  • Restore files.
  • Uninstall unnecessary programs.
  • Run Windows Updates to download patches and updates/
  • Wipe monitor screen with a moist paper towel or cotton cloth.
  • Clean keyboard and mouse.
  • Clean printers – remove dust and bits of paper with compressed air/vacuum, and run automated monthly cleaning kits.
  • Clean printers’ paper and ribbon paths with a soft cloth.
  • Replace printer ink or other printer components as recommended by the manufacturer.
Lastly, it is the things that needs to perform done every year:-
  • Go over the inventory lists and update if necessary.
  • Clean air vents, power supply, and fan with compressed air or vacuum.
  • Gently wipe the dust off of the computer case, tower, drives, and ports.
  • Check condition of surge suppressors and uninterrupted power supplies.
  • Ensure that chips and expansion cards are firmly seated in the slots.
  • Check ports and cable connections, and look for signs of wear on cords and wires to avoid loose connectivity problems.
In additional, they are several steps which need to perform whenever changes are made within the PC and they are:-
  • Update backup records of CMOS Setup.
  • Keep a record of software and operating system installed on the PCs.
  • Keep a record of hardware and hardware settings installed on the Pcs.
  • Record when and what preventive maintenance is performed.
  • Record any repairs done to the PCs.

PC Tool kits and their functions.

PC tool kit

  What is PC Tool kit?

It is actually provides you with all of the tools you will need to repair and maintain your computer. Basically, the features of the tools are depending on the prices itself. However, the most popular tool kits being used contain 20 pieces of kits.

20 Pieces Tool Kits and their function

Chip Inserter    Chip Inserter with pin straightener

Function: This tool is designed to insert a DIP chip into a circuit board.

Chip extractor

Chip Extractor  

Function: These tool is used to remove chips from regular (non-ZIF) sockets, but modern PCs do not generally use these sockets any more. It is useful for upgrading much older systems in some cases.


  Three Prong Parts Retriever

Function: This tool is mainly used to retrieve screws, although is also helpful in retrieving jammed bits in the motherboard.

Assembly Tweezers

 Function: It is a tools used for picking up and manipulating objects too small to be easily handled with human hand.

 Slotted Screwdriver – 1/8″, 3/16″, 1/4″, #1,#2 & #0

Function: It is a good screwdriver with magnetic, interchangeable bits and a comfortable handle. The magnetic tip will prevent screws falling into the PC, and will let you get access to drives mounted deep in your system case.

  Nut Driver 3/16″

 Function: It is the really important one because this is the size of nut most commonly used on PCs. These hexagonal nuts are used as mounting hardware for motherboards and serial and parallel ports.

 Nut Driver 1/4″

Function:  It allows one to use a single handle with a number of sizes instead of having a separate nut driver for each size.

Torx Screwdriver or Bits

Function: These are the star-shaped screwdriver heads that are used to make equipment “tamper-proof”.

  Long Nose Piler

Function: It also can help to cut wires and they can get in and out of tight spots, unlike regular pliers.

Needle Nose Tweezer

Function:These are useful for grasping small items and for removing and replacing jumpers on circuit boards.

 Spare Part Tube 

Function: These handy parts tubes is use to hold extra computer screws, nuts and washers.

 Soldering Iron

Function: It is essential for repairing circuit boards but seldom being used and it is quite dangerous for improper use.

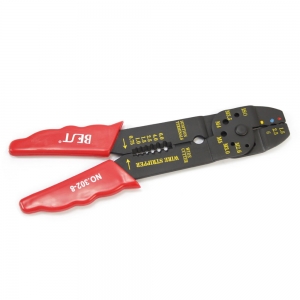
 8″ Wire Cutter/Stripper

Function: It is for wire cutting and stripping insulation on single, multiple and fine stranded wire cables with plastic or rubber insulation.

 6″ Adjustable Wrench

Function: It is a spanner with a “jaw” of adjustable width which allow it to be used with different sizes of fastener head (nut, bolt etc.) rather than just one fastener, as with a conventional fixed spanner.

Technology used during First World War (1914-1918)

The word technology means the invention, methods or the like. First world war happened in the year of 1914 to 1918 where it was said to be the first truly technological war. Basically, there were many methods or technologies can be used during the war. During the first world war, many ideas were pioneered over the use of tanks and the new system of communication.

Communication plays very important role for all the armies during the war. Once the communication is broke down the results could be fatal. Based from the history of first world war, it happened in 1914 to 1918 where most of them used up-to-date technologies and others dated from more historic conflicts.

As communicating with each others are very important, there were multiple technologies were used in terms of communication such as telephone, radio, visual communication, radar, and also pigeons.

In this post, it is one of the example where most of the aircraft armies used during the first world war. This technology known as Aircraft Radio Telephony Transmitter.

Aircraft Radio Telephony Transmitter may be benefits to the armies rather than they used the old techniques which is raising flags and hand signals. With this technology, it was invented in order to direct the aims of artillery and also to report the enemy troop movements.

This radio telephony transmitter consists of microphone with a round valve. This equipment was installed on the aircraft during the first world war. By installing this radio communication equipment, the advantages has been seen between the aircraft as well as ground to air communication.

The picture above is the inventor of radio communication and he is Guglielmo Marconi. He’s an Italian creator where he spent most of his working life in England where he introduced many of the first uses of wireless telegraphy to European navies.

Overall, it was a success technology even though there were still a number of navies died furthermore there are some survived during the World War I.

Assembling & Disassembling PC hardware/Components.

Today we were asked to uninstall and install back all the hardware in the PC except for the motherboard and power supply which counts as practical in Hardware technology. With the help of the tool kits we were able to unscrew the PC easily and with that we were able to know more how the internal of PC looks like.. There some pictures that had been taken while we uninstall and installing the hardware where we somehow find it confusing when it comes to wiring part.

Before proceeding with the Hardware or components pictures or images inside the PC, I would like to introduce you our Hardware Technology Group, named Bb’s and our partners name are Nor Suaidah, Zawani, Nur Farhana and me myself Hazwani Adilah.

Here are the pictures or images that have been captured using our hand-phone camera during the assembling and disassembling the components or hardware in the PC.

This is tool kits or PC tools that are used to disassembling and assembling the Hardware Component in the PC.

First thing first, we were given a PC in a group of 5 where 4 people in each group. We were told by our instructor to dissemble the PC except for the power supply and motherboard. The PC given was HP brand and Windows Vista.

Steps on how to disassemble a computer

  1. The first thing you do, is unplug every cable that’s plugged in to your computer.

  2.  Now that your computer is fully unplugged, move your PC to a clean work space, preferably a carpet. The carpet is better than tile, because screws and other small parts will roll around.
  3. Remove outer Shell/Casing
  4. Now that the case is off, begin to remove the internal components which is system fan. Remove the CPU fan.
  5. Unscrew the power supply.
  6. Unscrew or disassemble DVD or CD Drive.
  7. Remove or unscrew the Card reader (Available in new computer)
  8. Remove the hard Disk Drive.
  9.  Remove the Expansion Card slots.
  10. Remove the Connectivity Center Cables
  11. Remove RAM (Random Access Memory)
  12.  Remove Power Button & Power LED + HDD LED
  13. Remove the Connectivity Center
  14. Remove Motherboard.

Those steps mentioned above are the supposedly or proper way on how to disassemble all the hardware or components in a Computer. However, due to lack of components inside the PC, we were able to disassemble only the necessary components that was directed by our instructor.

Disassembling

The first thing to do is we open the container of the PC and the internal of the PC look like the picture below.

After that, we did the disassembling all the hardware which have been direct by our instructor and all the hardware that we have uninstall are such as Hard Disk Drive, Floppy Disk, CPU Fan, Cooling Fan, Speaker, CD Rom Player and USB ports.

Next, we will show you our group while they disassembling and installing back all the hardware to its position earlier.
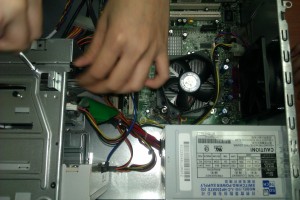
First this picture above shows that we was disassembling the Hard Disk Drive using PC tools provided by the instructor.

Next, the above picture is showing you that we were trying to disassemble the DVD Rom and the second pictures is how the DVD Rom of the Hardware in the PC look like.
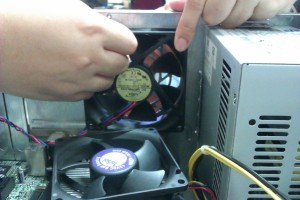
 

Followed by the above pictures shown, it shows that the cooling fan was uninstall from the PC.

On the other hand, this is the USB Port and the the audio entertainment from the front side of the PC.

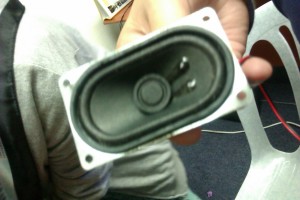
This is where the speaker from the PC was disassemble and it looks like the second picture been post here.

However, this are the images where we have disassemble the CPU fan.

This is where the floppy disk were taken out from the PC.

From this, we have completed disassembling all the components or hardware inside the PC, with that we had to assemble back all the components that have been disassemble from its position earlier. Overall we managed to complete the assembling and disassembling the components in the PC.